From seed (or bare roots) to harvest!
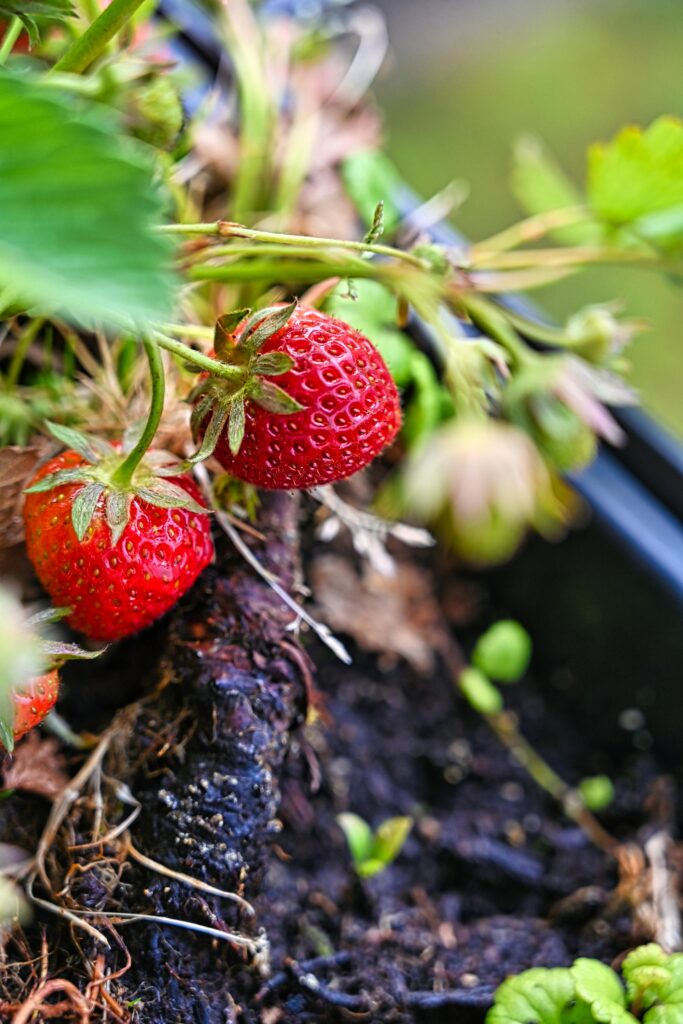
Strawberries are one of the most beloved fruits worldwide, prized for their sweet flavor, vibrant color, and impressive nutritional profile. Packed with vitamin C, antioxidants, and fiber, these juicy berries not only taste delicious but also offer a range of health benefits, from boosting immunity to supporting heart health. My strawberry patch is my pride and joy so I’ve created a basic guide to growing strawberries, whether you are starting from seed or planting bare roots!
Growing Strawberries From Seed
TIP: Strawberries are hardy perennials. They do become less productive after a few years of producing, so be sure to propagate runners for a new generation of strawberries each year.
Starting strawberries from seed can be a bit tricky so patience is key.
1. Choosing Strawberry Seeds
• You can grow strawberries from seeds collected from existing fruit, but it’s better to buy seeds from a reputable source to ensure good germination and quality. Seeds Now is one of my favourite and reputable source of seeds. Click here to check them out!
• Alpine strawberries are a popular choice for growing from seed since they germinate more reliably than larger-fruited varieties.
⸻
2. Prepping The Seeds (Cold Stratification)
Strawberry seeds need cold stratification to mimic winter conditions and encourage germination:
• Place the seeds in a damp paper towel or small container.
• Seal them in a plastic bag and refrigerate for 3–4 weeks. This helps to break dormancy.
⸻
3. Sowing the Seeds
• After stratification, fill a seed tray or small pots with a light seed-starting mix (a mix of peat and vermiculite works well or a quality mix from the garden centre will do).
• Lightly press the seeds into the surface of the soil without covering them — strawberry seeds need light to germinate.
• Mist the surface with water to keep it moist but not soggy.
⸻
4. Germination
• Keep the tray or pots in a warm place, ideally 65–75°F (18–24°C).
• Use a humidity dome or plastic wrap to keep moisture levels high.
• Germination can take anywhere from 1 to 6 weeks — patience is key!
⸻
5. Caring for Seedlings
• Once the seeds sprout, remove the cover and place them under grow lights or in a sunny window.
• Keep the soil moist but avoid overwatering, as strawberry seedlings are prone to damping off.
• Once they have a couple of sets of true leaves, thin them out or transplant them into larger pots.
⸻
6. Hardening Off and Transplanting
• After the last frost, start hardening off the seedlings by exposing them to outdoor conditions for a few hours a day over a week.
• Transplant them into well-draining soil in a sunny spot.
⸻
7. Ongoing Care
• Strawberries like slightly acidic soil (pH 5.5–6.5).
• Keep them well-watered but avoid soggy soil.
• Remove runners if you want to encourage larger fruit production.
⸻
8. Harvest
• Strawberries usually take about 4–6 months from seed to fruit, so be patient!
• Alpine varieties may produce fruit the first year, while larger varieties might take until the second season.
TIP: Apply compost or a natural fertilizer to the soil before transplanting the plants.
Growing Strawberries From Bare Roots
1. Choosing Bare-Root Strawberry Plants
• Bare-root strawberries are dormant plants that have been dug up, cleaned of soil, and stored under cool conditions.
• There are three main types of strawberries to choose from:
• June-bearing – Produce one large crop in early summer.
• Everbearing – Produce two or three smaller harvests throughout the growing season.
• Day-neutral – Produce fruit continuously throughout the growing season as long as temperatures stay moderate (around 35–85°F or 2–29°C).
• Make sure you buy from a reputable supplier for disease-free and high-quality plants.
⸻
2. When and Where to Plant
• Timing: Plant bare-root strawberries in early spring as soon as the ground is workable.
• Location: Choose a spot that gets 6–8 hours of direct sunlight daily.
• Soil: Well-draining soil is essential to prevent root rot.
• Strawberries prefer slightly acidic soil with a pH between 5.5 and 6.5.
• If your soil is heavy clay, amend it with compost or aged manure to improve drainage.
⸻
3. Preparing the Roots
• Soak the roots in lukewarm water for about 1–2 hours before planting to rehydrate them. I have found this step to be absolutely necessary.
• Trim any excessively long or damaged roots to about 4–5 inches to encourage healthy growth.
⸻
4. Planting Technique
• Space plants 12–18 inches apart in rows about 2–3 feet apart. This allows air circulation and room for runners to spread.
• The crown (the point where the roots meet the stem) should sit right at soil level. If the crown is too deep, it can rot. If the crown is too high, the roots may dry out.
• Fan the roots out gently in the planting hole.
• Backfill with soil, making sure the roots are fully covered but the crown remains exposed.
• Lightly tamp the soil to remove air pockets.
⸻
5. Watering
• Water thoroughly after planting.
• Keep the soil consistently moist (but not soggy) during the first few weeks to help the roots establish.
• Once established, water about 1 inch per week — more during hot, dry spells.
⸻
6. Mulching
• Add a layer of straw, pine needles, or shredded leaves around the plants to:
• Keep the soil moist.
• Suppress weeds.
• Protect developing berries from direct contact with soil (reducing rot).
⸻
7. Managing First-Year Growth
For June-bearing and everbearing types:
• Remove some flowers for the first 4–6 weeks after planting. Some recommend to remove all flowers but I found leaving a few behind does just as well. Plus, you can enjoy a few berries this way.
• This encourages stronger roots leading to better long-term production.
For day-neutral types:
• You can allow them to fruit earlier since they’re naturally more productive over the season.
⸻
8. Controlling Runners
• June-bearing strawberries produce a lot of runners (horizontal stems that develop into new plants).
• Allow some runners to root if you want to expand the patch.
• If you prefer larger fruit and healthier plants, cut off excess runners so the plant can focus on fruiting.
• Everbearing and day-neutral strawberries produce fewer runners, so they require less maintenance in this area.
⸻
9. Feeding and Fertilizing
• After planting, feed the plants with a balanced fertilizer (10-10-10) to support root and leaf growth. I will always recommend using a natural fertilizer to have an organic harvest!
• Once flowering starts, switch to a fertilizer higher in potassium and phosphorus – or nutrient rich compost – to promote fruiting.
• Avoid over-fertilizing with nitrogen — it will lead to leafy growth at the expense of fruit.
⸻
10. Winter Care
• In colder climates, cover the plants with a thick layer of straw or mulch (about 3–4 inches) after the ground freezes.
• Remove the mulch in early spring once the plants start showing new growth.
⸻
11. Harvesting
• Most June-bearing and everbearing plants produce a small crop in the first year, but larger harvests come in the second year.
• Day-neutral varieties will often start producing fruit within 3 months of planting.
• Harvest berries when they are fully red and slightly soft.
⸻
Pros of Bare-Root Plants:
– Faster to establish than seeds
– More reliable and consistent fruiting
– Cheaper than potted plants
– Wider variety selection
Potential Challenges
Plants may experience transplant shock, watering and proper soil contact help avoid this. Overcrowding can lead to fungal issues — spacing and air circulation are key.
Pests like birds, gophers and bugs like to chew on the sweet flesh of the berry. Paint some rocks red and place them around the strawberries, cover them with netting or spray natural deterrents if this becomes an issue.
Growing strawberries can be tricky, but with a little TLC, you can have sweet, juicy berries in no time. Just remember: keep the crowns at the right height, don’t drown them with love (or water), and give them room to stretch. The first year might be a bit of a warm-up, but by the second season, you’ll be rolling in strawberries — enough for snacking, shortcake, and even some homemade jam (if you don’t eat them all first). Happy growing — and may your strawberry patch be as sweet as the fruit!


